Pages

Thursday, May 31, 2012

Chocolate Gelato

With the weather getting warm, now is the time for some great Gelato and ice cream recipes. For the next couple of weeks I will be posting delicious Gelato and ice cream recipes you can make at home for yourself or family. This recipe is from The Italian Dish.


Ingredients:
 1 quart whole milk 1 tablespoon plus
1-1/2 teaspoons cornstarch
1/2 cup light corn syrup
1/3 cup sugar
1/2 teaspoon kosher salt
8 ounces bittersweet chocolate (about 70 percent cocoa)
1 teaspoon vanilla extract

Instructions:
 Place 2 tablespoons of the milk in a small bowl. Whisk in the cornstarch to make a slurry and set aside. In a pot, add the remaining milk and bring to a boil over medium heat. Whisk in the slurry, corn syrup, sugar and salt. Return the mixture to a boil and whisk in the chocolate until completely smooth. Transfer into a bowl and let cool to room temperature. Once cooled, stir in the vanilla extract. Cover and refrigerate for at least 3 hours or preferably overnight to make sure it is completely chilled. Whisk the base and then pour it into your ice cream maker and churn. The gelato should be the consistency of soft-serve ice cream. You don't need to churn it as long as you do ice cream -you want it to just be a custard sort of consistency, not completely frozen. Store in a chilled container in the freezer, with plastic wrap pressed onto the top. (After the gelato has been in the freezer for a day, take it out about 10 minutes before ready to serve to let it soften up).

Cute and Easy Dress with Headband

     I just wanted to do a quick post and show you what I have been working on.  I have been seeing these dresses and I am not exactly sure what they are called but I think that some people refer to them as pillowcase dresses.  I found some great tutorials online for these and I didn't even need to use a pattern.  The dress and headband cost me a total of $4.50! I love that! I made the dress just right so that both my girls can wear it.  Here is the finished product!  There are so many great fabric designs out there to get creative with.  I will definitely be making more of these in the future. Enjoy!


Friday, May 25, 2012

DIY Sign from Pallets

     I absolutely love this sign!  This is one of the first things I ever saw on Pinterest and I knew that I wanted to make something from it right away.   For this project, my husband helped me dismantle a pallet.  We used the wood and attached pieces together to make a sign.  I really love the look of it because none of the wood is perfect, it's staggered, and I think it adds a ton of character.  I painted it brown and painted on this awesome saying.  I think it will fit perfect in our home.  I am so excited to see what it looks like when it is up on the wall.  Hope you enjoy and get inspired, Jen :)

Thursday, May 24, 2012

Honey Whole Wheat Bread


There is nothing better than homemade bread and with my husband and I trying to eat more whole natural foods awhile ago I decided to make our breads. This way we are able to control the ingredients put in, I came across this blog called 100 Days of Real Food. This blog is amazing with menu plans for whole unprocessed foods and recipes as well, it is a great source. I put this recipe in my bread machine.


Yield: 1 loaf

Ingredients

  • 4 ¼ cups whole-wheat flour
  • ½ teaspoon salt
  • 1 ½ cups warm water (not too hot or it will kill the yeast)
  • ¼ cup honey
  • 2 tablespoons olive oil (or melted butter)
  • 1 packet or 2 ¼ teaspoons yeast

Directions

Follow your bread machine’s directions for making a whole-wheat sandwich loaf. For me that means putting in the dry ingredients first with the wet ingredients on top. I have the Sensio and it takes the machine 4 hours to make this loaf.


Tuesday, May 22, 2012

Mini Coffee Cheesecake with Caramel Whipped Cream


Recipe by: Baked by Rachel

Makes 8 mini cheesecakes Ingredients:

 6 oreo cookies, original (not double stuffed)
 2 1/4 tsp butter, melted
 6oz. cream cheese, softened
 1/3C sugar
 1 tbsp coffee syrup
 1 tbsp flour
 1 egg 1C whipping cream
 2 tsp caramel syrup, plus additional for drizzling
1/4C brown sugar

Preheat oven to 300 degrees.

In a food processor, pulse cookies until no large chunks remain. Melt butter, spoon 2 1/4 tsp into crushed cookies. Pulse to combine. Set aside. (Alternately cookies may be placed in a plastic bag and crushed with a rolling pin or meat tenderizer.)
In a medium bowl, beat cream cheese until smooth. Add sugar, coffee syrup and flour. Mix until well combined. Finally add egg, mix just until combined and no more. Grease 8 mini cheesecake cavities with nonstick cooking spray (such as Pam for baking). Divide crust ingredients evenly between greased cavities. Press down firmly to create a flat crust. (I use a flat bottom shot glass because it fits perfectly.) Carefully top off crust with cheesecake filling. Using a medium cookie scoop, roughly 2 1/2-3 scoops will fill each. Be sure to not overfill, these should be filled to 1/4″ from the top as they will puff up during the cooking process. Bake at 300 degrees for 15-18 minutes or the center is just slightly jiggly. Cool on a wire rack for 30-60 minutes. Transfer to the refrigerator for 2-4 hours or overnight. Carefully remove cheesecakes from the pan and removing discs from the bottom of each cheesecake. In a small-medium sized bowl add whipping cream, caramel syrup and brown sugar. Beat on high until very thick, approximately 4 minutes. Top off chilled cheesecakes with dollops of whipped cream. Or add whipped cream to a plastic bag fit with a pastry tip or snip the edge off and swirl whipped cream onto the tops of your cheesecakes. Drizzle with caramel sauce. Serve immediately.

Friday, May 18, 2012

Children Are a Heritage

     I think that one of the biggest mission fields that gets overlooked is the mission field of raising our children.  To teach them to love God, to walk this walk with them daily, and to show them the disciplines of reading God's word and praying.  As parents and I think especially moms, we tend to feel like what we are doing every day in our daily lives is not enough.  Like we are missing out on some greater calling on mission fields in other countries.  I believe that God wants us to really understand that our children are our heritage, that THEY ARE OUR MISSION FIELD.  God has called us right where we are at.  I have a very strong conviction to raise my kids in a Godly manner, to homeschool them, and teach them about the world around us through God's word.  I am continuing to see that everything in this world points to God, our amazing creator who gives us all things. 
     One thing that I have etched in my heart and mind is a word spoken over our family.  It is something that I hear in my thoughts daily.  A reminder of a purpose.
It is from Psalms 127:3-5
                  Behold, children are a heritage from the Lord, The fruit of the
                  womb is a reward.  Like arrows in the hand of a warrior, So are the
                  children of one's youth.  Happy is the man who has his quiver full of
                  them; They shall not be ashamed, But shall speak with their
                  enemies at the gate.
     Wow!  I think we really need to read this and let this sink into our minds! Get it in our hearts!  This is purpose!  God has entrusted us to guide these children.  He purposely gave these wonderful children to me and to you, so that we can guide them!  What an honor.  I don't believe that any children are accidents.  If they are created, than they have a purpose and a destiny.  It is our job as moms and dads to "shoot" them, like an arrow, with purpose to the target God has planned for them. 
     Please parents and especially moms, don't lose heart with what you are doing.  If God has called you to parent, He will be faithful to give you what you need to get these kids where He wants them! 
                                                                    Blessings, Jen

Tuesday, May 15, 2012

Bedroom Makeover

     For the longest time I have wanted to redo my master bedroom.  I basically had a room full of out dated furniture and barely anything on my walls.  What I did have on my walls reminded me of something you would see in my grandmas house.  Not exactly the look I am going for but it was something to fill space.  I didn't want to spend money to redo the room so I chose to take what I had and turn it into something that I would love.  The first thing to tackle was these very unattractive night stands, dresser, and headboard.  These were all an old worn out wood color and most of the finish was not even on them anymore.  They had these huge almost Gothic looking drawer pulls on them so I knew I wanted to do something else.  I painted them all black and found these cute knobs on clearance for only .79!  Here are some pics of the finished furniture.
Big dresser.  My husband side has "S" knobs and mine has "J" we put LOVE on the center


Nightstand for my side says J & B

My husbands nightstand has S & B
our initials

     The next thing was to bring some color in the room.  I found this bedspread for a really great price and painted the wall behind my bed red.  This really brought out the black in the headboard.  I then added a curtain on a rod behind the bed to give it a crowned look and found this cool tree decal that rubs onto the wall.  Both of these only cost $10.00.  Here is a portion of the wall.

     The next thing we knew we wanted was a sitting area.  My husband found this chair for free so we cleaned it and it fits in perfect!  The table and lamp only cost 3.00 at a yard sale and the ottoman was only 1.50 at a yard sale.  The ottoman was an old ugly pink so I made this black canvas like slipcover to go over the top for 3.00 and we now have the perfect place to read out Bibles in the morning!  Love it!
sorry about the pic quality but you get the idea. :)


     The wall behind the chair is not done but I painted these cool birds on a wire for a cheap and fun way to fill up some space.  I still have so many more ideas that I want to add in but was so excited with what we have done so far.  Hope you enjoy the makeover. I will add more pics as I get more done. 
                                                                         Blessings, Jen

Saturday, May 12, 2012

Hello Kitty Birthday Party

     The last couple days I had the privilege of helping my friend Jen create decorations and fun table ideas for her daughters Hello Kitty Birthday party.  This has been so much fun!  We both learned how to make Hello Kitty cake pops, Pompoms, dot candy, hello kitty goody bags, a pin the bow on Hello kitty game, and some hello kitty popcorn cones.  Everything looked great once it was all up and all of the kids had a great time!  Here are some pics of our creations.  Hope you enjoy!
                                                        Blessings, Jen
Hello Kitty Cake Pops :)

Pompom

More Hello kitty pompoms

Candy dots drying
Hello Kitty popcorn cones

Goody bags

Pin the bow on Hello Kitty game

Pompom


Thursday, May 3, 2012

Conference

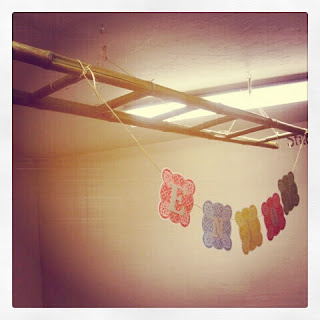
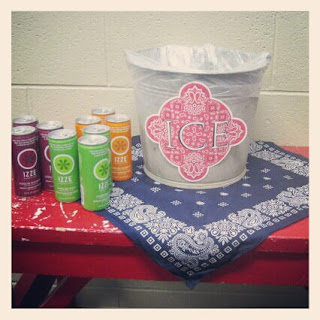
These lat few weeks and upcoming weeks have been very busy for me but, I wanted to show you some pictures of what I have been up to. As most of you know I love design, especially designing parties and stage work, well pretty much anything:) This weekend The Church I attend and work for is hosting a conference. I had the task to turn one of our classrooms into a dining area and another into a lounge. The theme is Summer BBQ, we wanted it to be very comfy and relaxing for our guests.

I still need to add the sunflowers but, you will get the picture.

Before:

Lemonade Bar:


Ikea Star napkin Holders

White board turned into a window menu board with burlap and wood frame


The Lounge:


Tooth Fairy Pillows

     It has been a fun day with the kids and their friends.  We have made oobleck, built forts out of blankets that filled our family room, danced crazily to Lecrae, and made some tooth fairy pillows.  These pillows are great and the kids got to pick their fabric and design.  We sewed a small pocket on the front for them to put their teeth in and it will also be the place that the tooth fairy leaves a surprise.  These pillows are super easy.  Cut out 2 squares of fabric, sew a smaller piece of fabric to one square which will serve as the pocket. Next, put both right sides of the fabric together so that when you sew it will be inside out.  Sew around three and a half sides leaving enough room to turn it right side out.  After you have turned it to the right side, begin stuffing with filling.  Hand sew the small opening shut and finally, paint on freehand or using a stencil the letters TF.  This is obviously for Tooth Fairy.  Here are some pics from our day! Enjoy!
The girls with their finished pillows

Anna Sewing her pillow

Abigail sewing

Kierra cutting her pillow out

Stenciling on the letters

Proud of their pillows

dancin crazy

girls dancing

more dancing