Pages

Wednesday, February 29, 2012

Something To Ponder

     A while back I had shared during a devotion time at church on the topic of "Finishing Strong."  This phrase has really been on my heart lately.  So many times in our lives we allow the cares of this world or even just the busyness of our daily lives to consume us.  We forget that we are here on this Earth for a reason.  We forget that there is a bigger picture.  Something bigger than what I am doing right now that seems to be overtaking my life.  Hebrews 12:1 says, "Therefore we also, since we are surrounded by so great a cloud of witnesses, let us lay aside every weight and the sin which so easily ensnares us, and let us run with endurance the race that is set before us."~NKJV
     This phrase, Finish Strong, applies to so many areas of our lives.  When I am exercising I am telling myself to finish strong.  As I am parenting my four lovely kids, on a daily basis, I am telling myself to finish strong.  You can insert pretty much anything and it will apply.  Ask yourself, What it is in your life that you want to accomplish?  What is it that you want to finish strong? 
     1 Corinthians 9:24 says, Do you not know that those who run in a race all run, but one receives the prize?  Run in such a way that you may obtain it. 
Philippians 3:14 tells us to "Press on to reach the end of the race and receive the heavenly prize for which God, through Christ Jesus, is calling us."
Let this by our hearts!
     I read about a woman named Wilma Rudolph. She was quoted as saying, "My mother taught me very early I could achieve any accomplishment I wanted to.  The first was to walk without braces."  As a child, Wilma had infantile paralysis caused by a polio virus.  She had to wear a brace on her left foot and leg which became twisted.  By the time she was 12 she had survived scarlet fever, whooping cough, chicken pox, and the measles.  By the time she was 16 she earned a spot in the US Olympic track and field team.  Wilma became the first American woman to win 3 gold medals in a single Olympics.  She was considered the fastest woman in the world in the 1960's! 
This is an AMAZING and inspiring story from someone who was probably told she would never walk without a brace, and probably told she'd never run.  I would say that Wilma Rudolph finished strong! 
     When I hear something like this, it challenges my very being.  This is an amazing and precious life that we live.  We have incredible opportunity every day to finish strong, to change our thinking, to change our actions, to change the world!  Let us walk this life with purpose.  Let us finish strong so that in the end we can say, "I have fought the good fight, I have finished the race, I have kept the faith." 2 Timothy 4:7

                                                                Blessings, Jen
Tuesday, February 28, 2012

Recipe Nostalgia

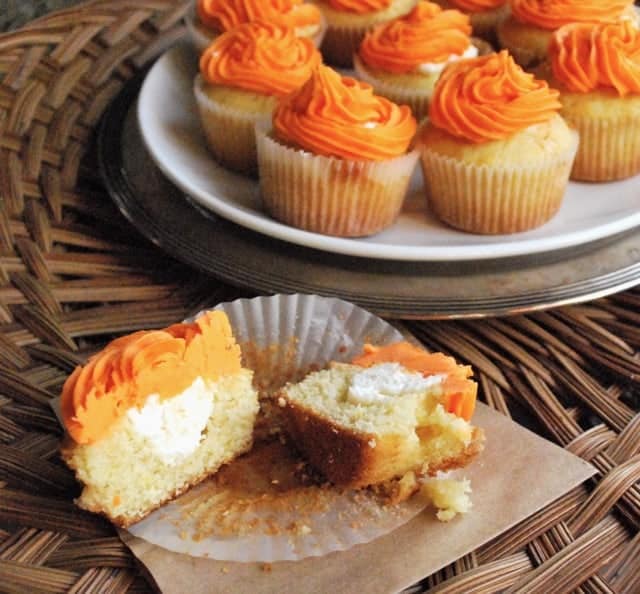
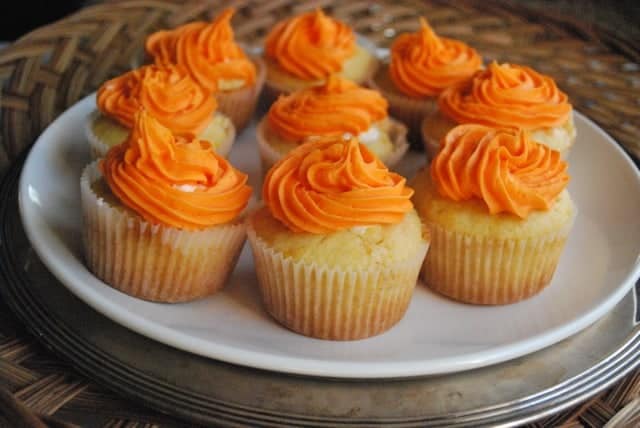
Have you ever came across a certain food that brings you back to a certain time or reminds you of a certain person? I remember going over to my Grandpa George and Grandma Patsy's house and having orange dreamsicle cups and taco salad. Our family had regular gatherings to watch wrestling ( ok cheesy, I know) or to play games. Those were some of my greatest childhood memories. Jen and I had the greatest Grandparents and they are greatly missed.
Our Grandpa was a bus driver and was nominated the towns friendliest man, we still have all the articles our locl paper did on him. My Grandma always had a smile on her face, she was a tiny little lady, who always had a something to say. Family was their life and they were sadly the glue that held parts of our family together. The other day I came across this orange dreamsicle cupcake recipe, here it is for you to enjoy as well: This one is for Grandma and Grandpa Boscawen.


Cupcakes:
  • 1/2 cup unsalted butter, at room temperature
  • 2 T citrus olive oil
  • 1 cup sugar
  • 2 T vanilla
  • 2 eggs
  • Zest of 1 orange
  • 2 cups all purpose flour
  • 1/4 tsp baking soda
  • 1/4 tsp baking powder
  • 1/4 tsp salt
  • 3/4 cup heavy cream
  • 1/4 cup orange juice, freshly squeezed
  • Preheat oven to 350 degrees and line muffin pans with paper liners.  (This made 16 cupcakes for me.)
    Combine butter, olive oil and sugar and mix on medium high speed about three minutes until light and fluffy.  Add vanilla and eggs and mix about one more minute until well incorporated.  Stir in orange zest.  In a separate bowl, sift together flour, baking soda, baking powder and salt.  Separately combine heavy cream and orange juice.  Add 1/3 of the flour mixture, followed by 1/2 of the cream mixture and repeat, finishing with the flour.  Mix until just incorporated after each addition. 
    Scoop batter into prepared liners, filling about 2/3 of the way full.  Bake about twenty minutes until a toothpick inserted in the center comes out clean.  Cool in pans about five minutes and then transfer to wire racks to cool completely.


Marshmallow Cream Filling:
  • 7 oz marshmallow fluff
  • 1/2 cup unsalted butter, at room temperature
Cut butter into small pieces and add to fluff in a mixing bowl.  Beat on medium speed until smooth and creamy.  Cut a small cone shape into the top of each cupcake and spoon marshmallow cream into wells allowing the cream to puddle on top of the cupcake slightly.  (Don’t add too much, when you add the buttercream, it will cause the cream to move out toward the edges of the cupcakes.)
Orange Buttercream:
  • 1/2 cup unsalted butter, at room temperature
  • 1/8 – 1/4 cup orange juice, freshly squeezed
  • Zest of 1 orange
  • 1/4 tsp vanilla extract
  • 4 cups powdered sugar
  • **I added a few drops of orange food coloring
 Beat butter on medium speed until light and fluffy, about three minutes.  Add orange juice, zest, and vanilla and mix until well combined.  Add powdered sugar, one cup at a time, mixing until incorporated to reach desired consistency.  Whip on medium high speed about two minutes until smooth and creamy.  Transfer to a piping bag fitted with desired tip and pipe onto cupcakes. 

Recipe found at: betsylife.com

Monday, February 27, 2012

Sharing Some Love! :)

     This is probably one of my favorite projects, not because of the looks of it but because of the main idea behind it.  I don't think anyone of us could possibly tell our family how much we love them.  I know that everyone, especially kids love to hear praise for good things they've done, acts of kindness, or for just being them. I  completely believe you can never say it enough.  So, I decided to make these "love buckets."  I purchased these cheap tin buckets for $1.00 and covered them with chalkboard paint. We have six people in our family so I used a chalk marker and wrote all of our names on them and hung them from a $5.00 curtain rod.  The whole idea behind these is to allow everyone in the house to notice the small things that occur during the day and give each other praise for it.  Whether it's a child being nice to another or just to say I love you, these are a great way to do it.  The kids also get a kick out of checking their buckets at the end of the day to see what everyone else wrote to them.  To finish off the look, I hung the Moss covered LOVE letters that we had blogged about earlier in our posts.  Here is the final product and we are all excited to let the encouraging words, and words of praise and love begin in our home. 


                                                                     Blessings, Jen :)

Friday, February 24, 2012

Burlap Wreaths

     I had a great time today with my good friend Jen making these wonderful burlap wreaths.  I'm pretty sure I am falling in love with burlap.  It is so inexpensive and comes in beautiful colors.  I chose to make a black wreath with black and white ribbon to go with my bedroom makeover I am doing.  My friend Jen chose brown with brown and white ribbon and both turned out amazing!  All that you need for this project is a foam wreath, burlap, ribbon to hang, and the larger head pins.  You will need about a yard of burlap for a 12 inch wreath.  Cut the burlap into 4x4 inch squares. 
Our stacks of squares cut out

     Next, take a burlap square and fold it into a triangle. Then take the right corner and fold it forward to the middle, and take the left corner and fold it back to the middle so it forms a bubble look.  From here you just start grabbing pins and pinning around the wreath form.

     Finally, we glued our ribbon together around the wreath to hang.  This is such an easy and fast project and it turned out great!

     I'm sure that you could have so much fun with these and add some fun birds or accessories but they really do look great the way they are as well.  Enjoy!

                                                                             Blessings, Jen

Tuesday, February 21, 2012

Bunny Napkin Fold

I am a huge fan of Martha Stewart and the other day I came across this really cute napkin fold for your Easter Celebration. He is referred to as "Warren" and would make a great addition to anyones table.

Pinned Image

STEPS TO CREATE: 
For more instructions on how to make "Warren" go to Martha Stewart

Sunday, February 19, 2012

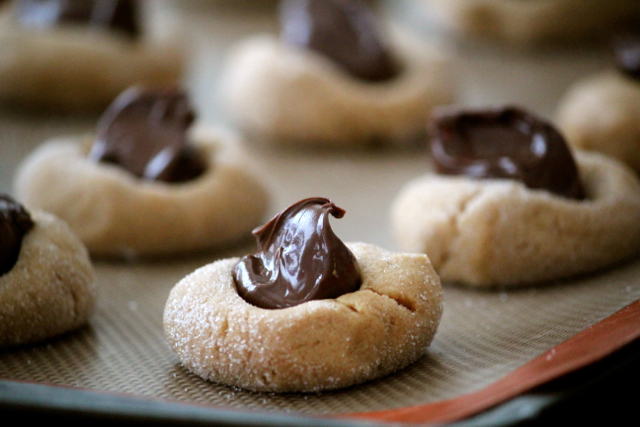
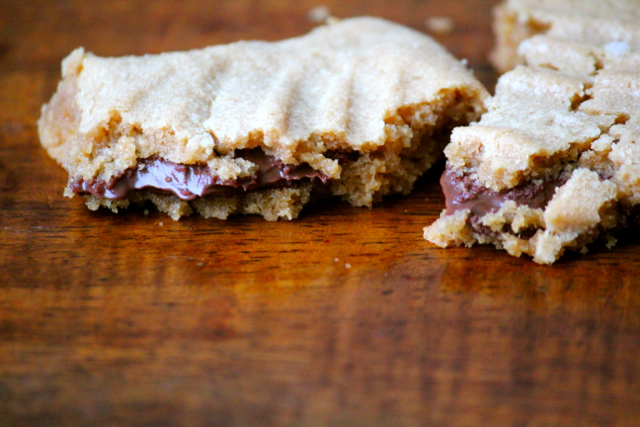
Nutella Stuffed Peanut Butter Cookies

Right know Nutella seams to be very popular and I totally understand why. Nutella is something you will find in our cupboards on a regular basis. Here is a great recipe for your Nutella craving.

IMG 5364 Nutella Stuffed Peanut Butter Cookies

IMG_5386

Adapted from Joy's Hope
Ingredients
  • 1/2c butter, softened
  • 1/2c brown sugar, packed
  • 2/3c sugar
  • 1 egg
  • 1c peanut butter
  • 1T milk
  • 1t vanilla
  • 1-1/4c flour
  • 3/4t baking soda
  • 1/2t baking powder
  • 1/4t salt
  • Sugar for rolling
  • Nutella for stuffing, about 12 teaspoons

Instructions
  1. Preheat oven to 350. Prepare two large baking sheets with a silicone mat (recommended) or cooking spray.
  2. In the bowl of a stand mixer, cream butter and sugar. Add egg and beat until smooth. Incorporate peanut butter, milk, and vanilla.
  3. Sift in dry ingredients and mix until completely combined. Refrigerate dough 30-45 minutes.
  4. Using a medium cookie scoop, roll dough into 24 uniform balls. Roll balls in sugar.
  5. Place the first dozen balls on prepared cookie sheets, 6 per sheet (they will spread). Place a thumbprint in each cookie. Using a teaspoon, scoop Nutella into each cookie, using your finger to scrape it carefully into the indentation.
  6. Lightly flatten the remaining dozen balls of dough and place them over top of Nutella, like a blanket, covering the Nutella completely. Taking a large fork, lightly flatten cookies until they are more flat on top, rather than mounded, being careful not to press too hard and cause the Nutella to ooze out.
  7. Bake 14-15 minutes until cookies began to turn golden on the edges, but still look slightly unset in the middle. Allow to cool 15 minutes before removing to a cooling rack. Cookies will be large.
Notes
Although I almost always prefer my cookies hot from the oven or warm, I preferred these at room temperature. The cookies are more fragile when warm, but firm up nicely when cool. Try them both ways and see how you like them.

Recipe found at: Alaska From Scratch

Tuesday, February 14, 2012

Happy Valentines Day

Today is one of my favorite holidays. I love having a date night with my husband but, have you ever wondered where it all started?


         The history of Valentine's Day--and the story of its patron saint--is shrouded in mystery. We do know that February has long been celebrated as a month of romance, and that St. Valentine's Day, as we know it today, contains vestiges of both Christian and ancient Roman tradition. But who was Saint Valentine, and how did he become associated with this ancient rite? The Catholic Church recognizes at least three different saints named Valentine or Valentinus, all of whom were martyred. One legend contends that Valentine was a priest who served during the third century in Rome. When Emperor Claudius II decided that single men made better soldiers than those with wives and families, he outlawed marriage for young men. Valentine, realizing the injustice of the decree, defied Claudius and continued to perform marriages for young lovers in secret. When Valentine's actions were discovered, Claudius ordered that he be put to death. Other stories suggest that Valentine may have been killed for attempting to help Christians escape harsh Roman prisons, where they were often beaten and tortured. According to one legend, an imprisoned Valentine actually sent the first "valentine" greeting himself after he fell in love with a young girl--possibly his jailor's daughter--who visited him during his confinement. Before his death, it is alleged that he wrote her a letter signed "From your Valentine," an expression that is still in use today. Although the truth behind the Valentine legends is murky, the stories all emphasize his appeal as a sympathetic, heroic and--most importantly--romantic figure. By the Middle Ages, perhaps thanks to this reputation, Valentine would become one of the most popular saints England and France.


Happy Valentines Day,
Pam

Monday, February 13, 2012

Do It Yourself Twine Vases

     Here is a great do it yourself project that is very cute and affordable.  You could use these as a decoration as they are or by putting a single flower in them.  All that you need are some fun shaped bottles, twine (which costs under $3.00 and goes very far), and some glue.  Here is a picture of the final product.  Hope you enjoy :)


                                                         Blessings, Jen :)

Sunday, February 12, 2012

Chair and End Table Refurbish

Last summer I picked up the cutest chair for $1.00. Yesterday my sister and I painted it and put new fabric on  it. The total cost of the chair was $20.00. Jen found the perfect fabric on the clearence rack and the exact amount I would need. Here is the results of the chair.
I Love the Colors!! It is a little hard to make out but there is different color gray's and a deep yellow..

Several years back I bought this cute little bistro table that had the cafe theme on it. I decided to paint it gray and then stencil a green bird and branch on it. 


Happy Sunday,
Pam

Friday, February 10, 2012

Herbs For The Kitchen

     This project is based off of something that I fell in love with on Pinterest.  I loved the idea from the moment I saw it and new that I had to give it a shot.  When I am shopping for groceries there is one herb that I ALWAYS buy because I can't get enough of it, cilantro.  So when I saw this board I knew that I wanted to grow my own cilantro.  I also decided to try and grow some rosemary and parsley.  I say "try" because I am usually not to good with live plants. lol!  I am so excited to see and eat the fruit of this though!  All that you need for this project is a piece of wood, some paint, mason jars, soil, seeds of your choice, chalkboard paint, and some chalk.  This was a very inexpensive idea and I'm believing it's going to pay off.  I am excited to hang it in my kitchen and watch it grow.  My friend Jen H. joined me and made one for her house as well.  We had so much fun.  Here are some pics below of the process and one complete project. Hope you enjoy :)
Finished product

after a coat of paint

sanding

what you will need

lining up the jars to glue

                         Blessings, Jen :)

Wednesday, February 8, 2012

Simple Valentine Cupcake DecorationsTo

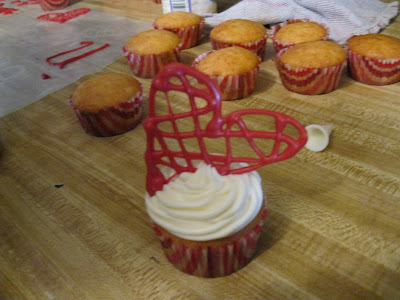
To make the hearts simply melt the chocolate and then put it in a squeeze bottle. Draw hearts on wax paper and let dry. Once dry decorate your cupcakes. We made cherry chip cupcakes with cream cheese frosting. YUMMY...  


Monday, February 6, 2012

Valentines Decorations

I love Valentines Day and decorating for valentines day. Here are some inspirational decorating ideas for you. Enjoy!!

redhots.


Pinned Image


Some Weight Loss Motivation

     If you are one of the many people who are on a weight loss journey this may be  some fun and help to you.  No matter what your reason is for losing weight, we all need some help and motivation sometimes.  So, here is a cool little project that I saw and thought it would be great motivation.  All that you need is two glass jars of some sort,  glass beads, and a marker or letter stickers.  I got all the supplies I needed at the Dollar Store for $3.00.  There are so many creative ways that you could go about doing this but this way seemed simple. (Which I liked)  :)
The finished product


Blessings, Jen :)


Wednesday, February 1, 2012

YOU ARE Someone Worth Dying For!


     There are so many people in the world who feel helpless, lost, unloved, and the list goes on.  This is a song that really touched my heart and it's worth taking the time to watch and listen.  How many of us really believe that we are someone worth dying for?  Do you believe that you were born on this earth for a purpose, a plan?  You were born for such a time as this!  God's word says that He made all the delicate, inner parts of our body and knit us together in our mother's womb. Psalms 139~ If God chose to make us and form us, to spend time on us, than we need to believe that we ARE here for a purpose.  We ARE someone worth dying for!  You may be the man trying to provide, or the girl who feels so lonely and waiting for the right man.  We are not just wondering souls, but God sees us right where we are.  The amazing news is that He also meets us right where we are.  So many of us ask the questions in this song. God do you hear me?! Am I more than flesh and bone?  The answer, ABSOLUTELY! 
     If you are reading this, please take the time to watch the video.  Take the time to call out to God.  We all have a desire to feel like we have a purpose and the wonderful news is we ALL do! 
     Romans 5:6-8~ When we were utterly helpless, Christ came at just the right time and died for us sinners.  Now, most people would not be willing to die for an upright person, though someone might perhaps be willing to die for a person who is especially good. But God showed his great love for us by sending Christ to die for us while we were still sinners.
                                                                    Blessings, Jen